Oracle launched Oracle Integration Cloud (OIC) mainly to help developer:
- Integrate SaaS application with on premise and vice-versa (Integration). This got widely popular amongst companies using Oracle Fusion SaaS ERP as using Integration one can exchange data with SaaS ERP and other systems like On-premise EBS, any Database, SAP, Workday and many other existing Cloud application. It gives you ability to create Soap or Rest web services as end point so that any application can call these web service. Also one can create schedule jobs to transfer data from one application to another, e.g. You can call a BI Report on Oracle SaaS ERP to extract invoice created in last half an hour and store at any other location like database or any other SaaS application like SAP.
- Create new web forms or mobile application (Visual Builder). It gives you ability to create application using drag and drop components. You can leverage JavaScript knowledge to develop dynamic application. Also you can develop mobile application as well.
- Process Automation (Processes). Any business process automation with graphical visual like workflow approval kind of process can be built. This gives you flexibility to view graphics to know the status of the process triggered.
- B2B: Enable Business-to-Business E-commerce. It is used to securely and reliably exchange business documents between trading partner. Standard documents like EDIFACT, AS2 using Transport protocol like AS2, SFTP
That was all about brief introduction about OIC and its feature. Now let’s go through the steps involved in creating OIC instance in Oracle OCI (Oracle Cloud Infrastructure). Oracle has provided OIC as a part of OCI service. Create you OCI account, you can use 30 days trial period for the below exercise.
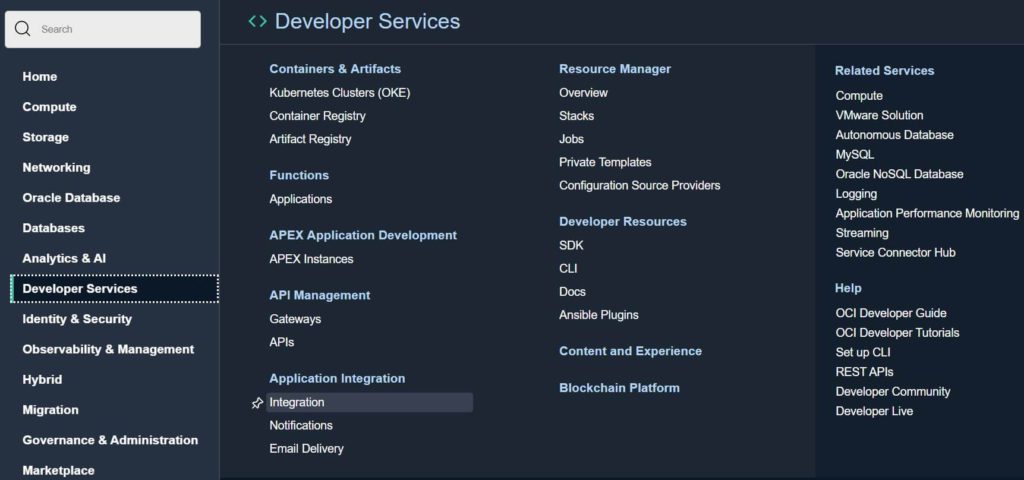
- Login to OCI and navigate to Developer Services > Application Integration and click Integration
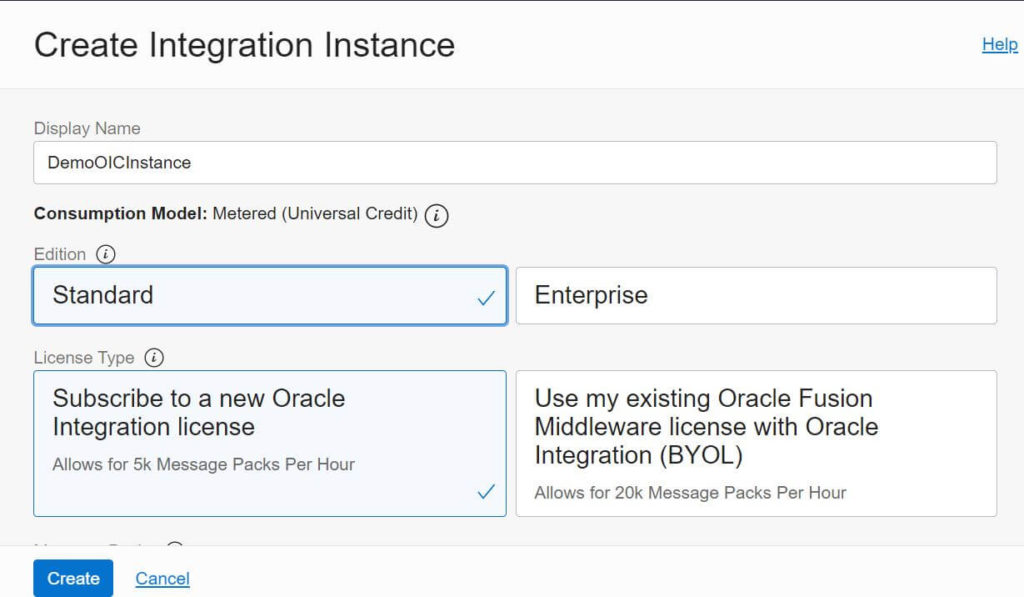
If you don’t have federated user created then follow link for prerequisite set up before proceeding to next step, otherwise you may encounter error “You are not authorized to create or edit integration instances“.
- Click on Create Integration Instance

- ad
- Enter Name and click Create. It will take sometime for instance creation. Once created it will show status as Active

- Click on the above Instance Name
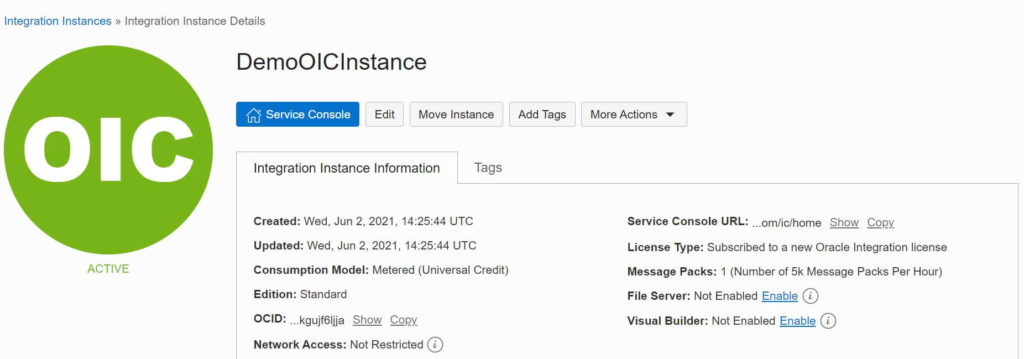
- Click on Service Console